

Install Guide
Requirements and General Information
Recommended Specs
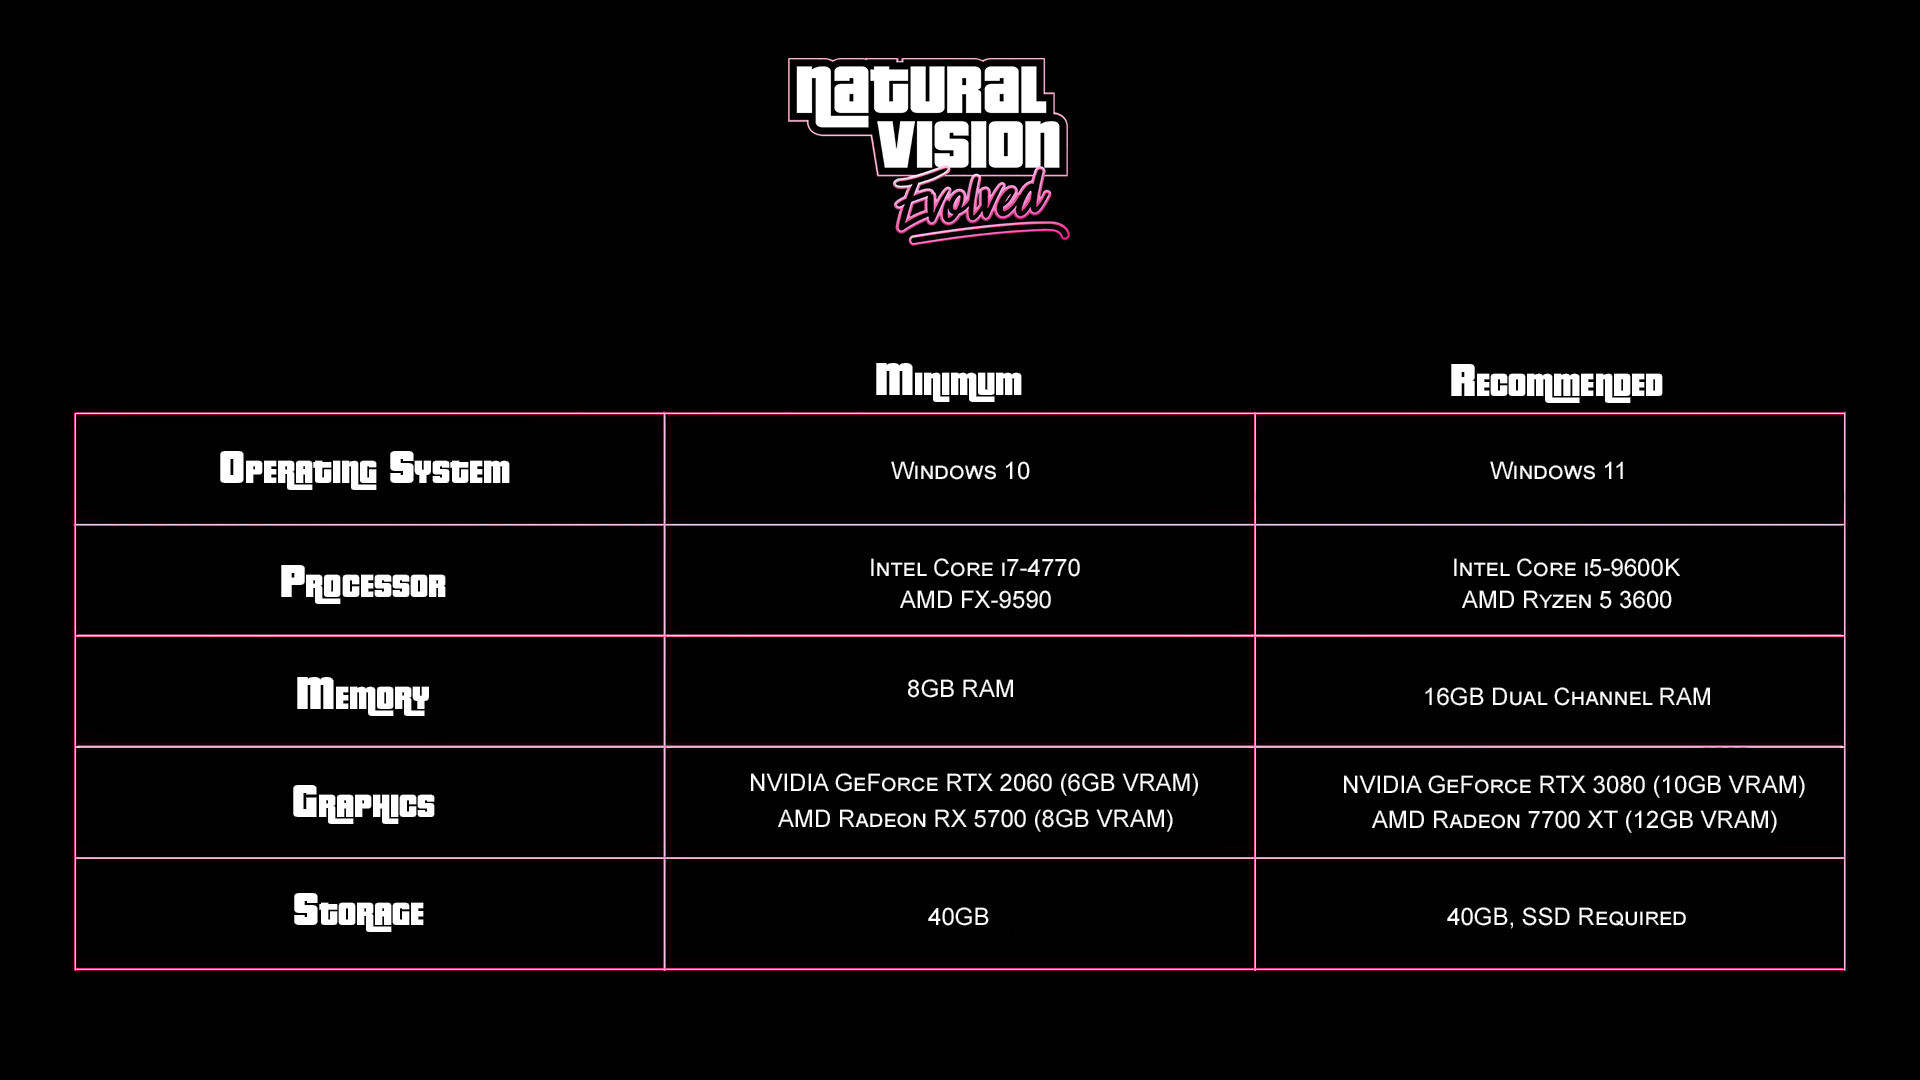
With NaturalVision Evolved, in-game performance will be about the same as vanilla in most places. Weathers with volumetric clouds will cause some FPS loss.
Getting Ready
Before we begin, make sure your game folder is clean. If you are using a previous version of NaturalVision then uninstall it from your FiveM 'mods' folder.
Install Instructions
ReShade Shaders and CitizenFX.ini
Click on the folder labeled "ReShade Shaders" and open it.

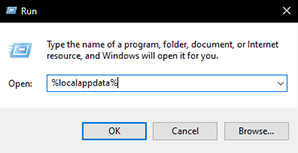
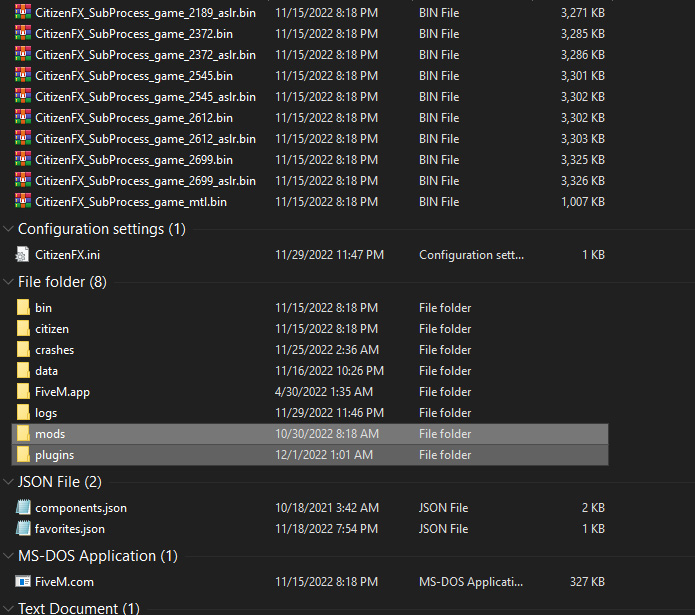
IMPORTANT: In order to use ReShade on FiveM, open CitizenFX.ini in your FiveM Application Data folder and follow the steps in this video exactly
Add the line with your ID to CitizenFX.ini as shown in the video. Then launch FiveM, open FiveM settings (Game tab) and make sure "Update channel" is set to "Release".
After this you should be able to use ReShade on FiveM.
Post-install
We're done installing NaturalVision Evolved for FiveM! Before starting your game, read the sections below for additional information.
Settings Tips
Disable in-game MSAA to view volumetric clouds properly.
Set GTAV PostFX and Particles Quality to "Very High" or "Ultra" for shaders and effects to work properly.

Set GTAV Shader Quality to "Very High".

Set DirectX to "DirectX 11" under Graphics settings.
ReShade Tips
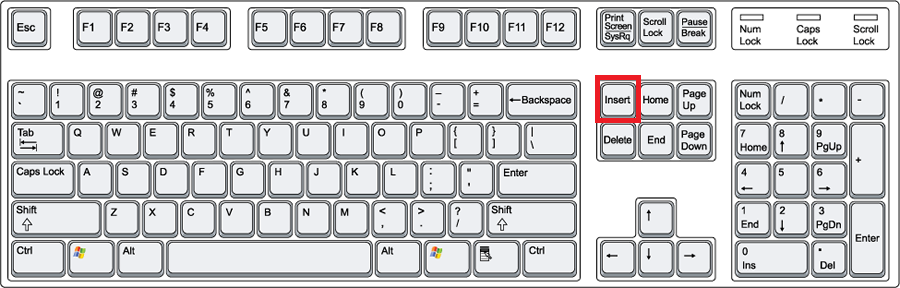
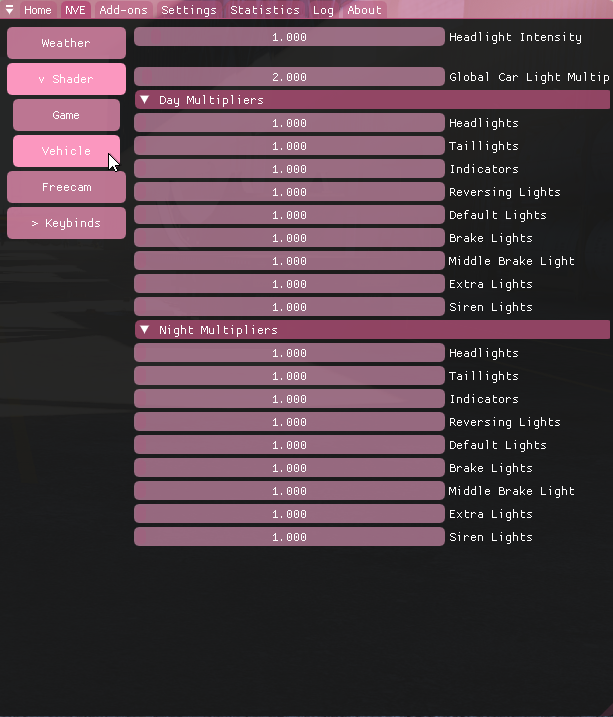
Open the ReShade menu with the INSERT key and go to the "NVE" tab.
Enable "Enable shader modifications" under the Shader game menu to begin tweaking effects. All modifications are automatically saved.
Under the "Vehicle" tab, you can adjust emissive intensity of vehicle lights and sirens, and vehicle headlight intensity.
Use the "Preset" dropdown to create and save a new preset.
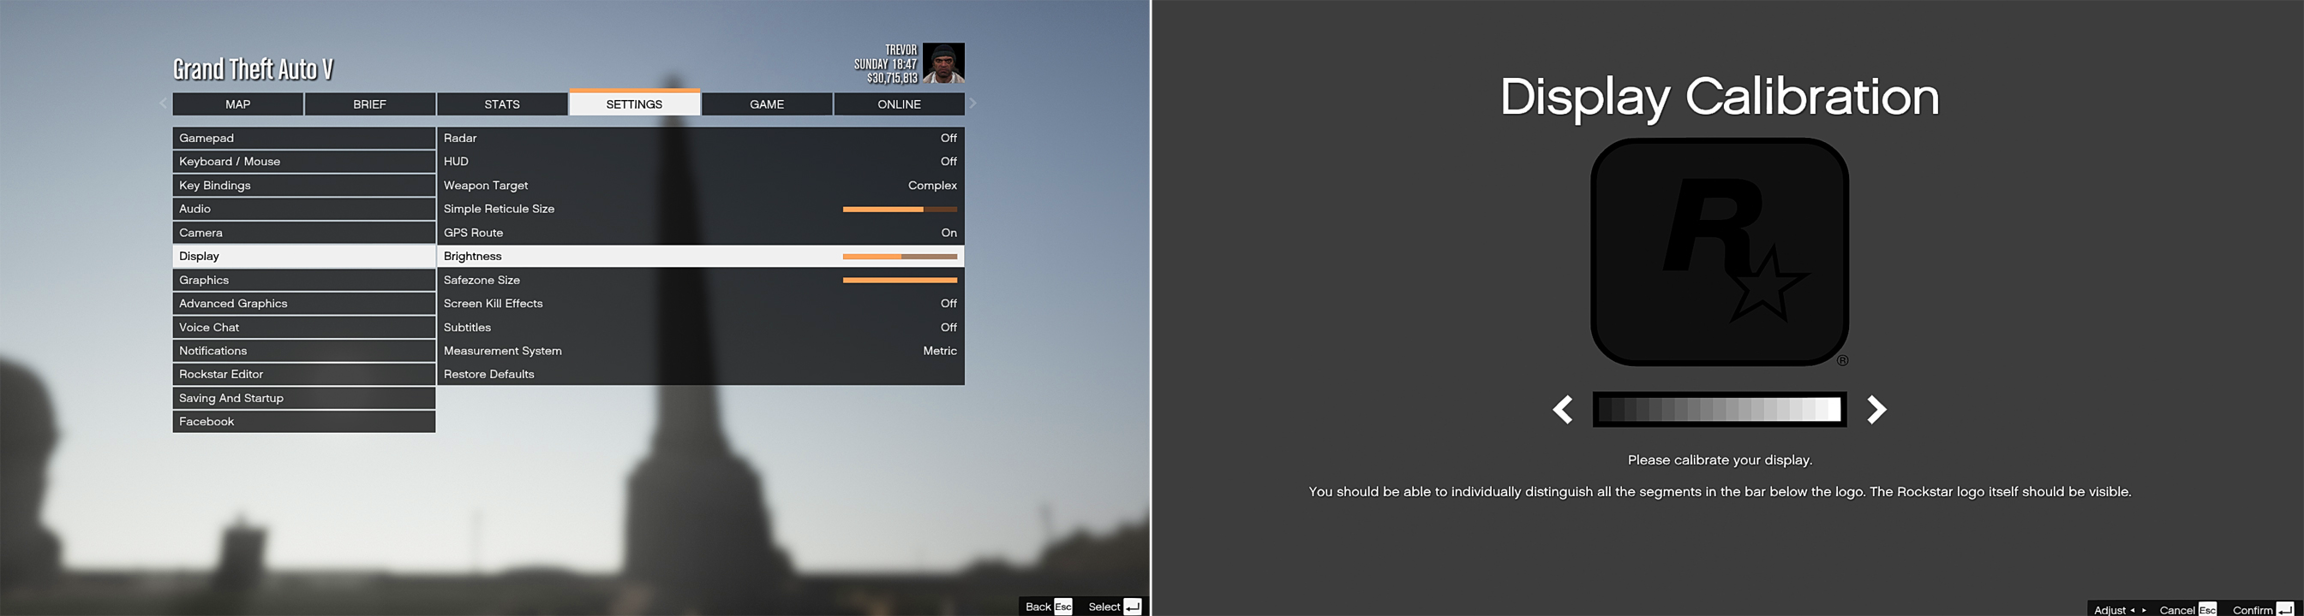
Display Brightness Tips
It is very important for you to set the correct brightness level. Otherwise you won't see certain details properly.
Try to keep your GTAV display brightness at 50% for the best possible experience.
You can copy my settings below. Keep in mind they're based on my own monitor's brightness settings.
To get the best possible results, I suggest reading this guide and calibrating your monitor's display settings.
Alternatively, you can take all the tests on the top of this page and calibrate your monitor as you go along.
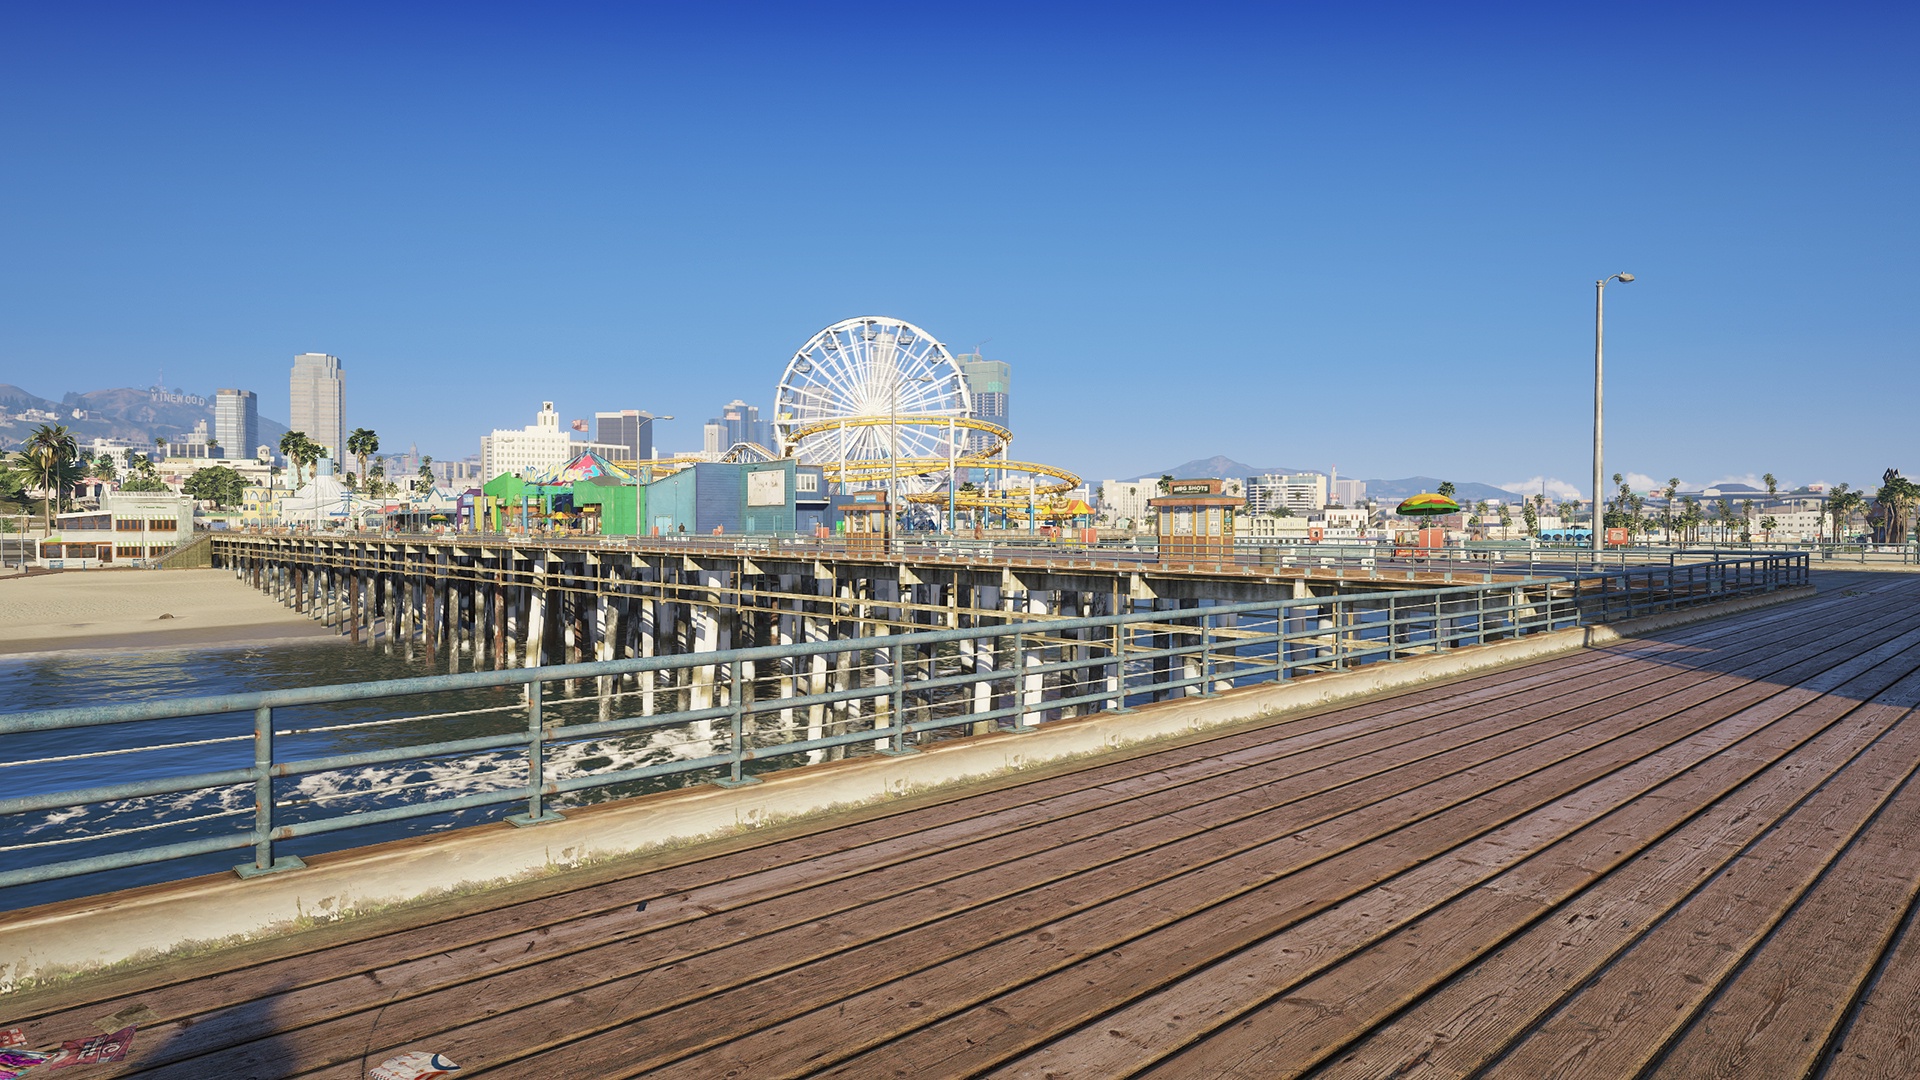
Try to match colors, contrast and gamma with the picture below. Weather: ExtraSunny Time: 18:00 Location: Del Perro Pier
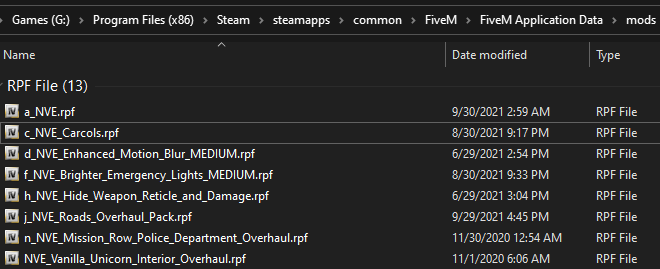
Optional Add-Ons (overview)
There are several optional add-ons within the NVE folder. Brief descriptions:
DLSS, DLAA & FSR Upscaler Plugin — enable DLSS / DLAA / FSR in GTAV. Install into FiveM 'plugins' folder. MUST disable in-game MSAA before installing.
Brighter Emergency Lights (LSPDFR) — increases emergency lights intensity; removes excessive glow on taxi adverts and bus/metro LED signs.
Animated Gas Stations and ATMs — colorful neons and animated lights for gas stations; animated screens for ATMs.
Parallax Roads and Pavement Overhaul — installs high-quality parallax roads, sidewalks and pavement.
Extra Vegetation (Heavy) — adds hedges, bushes, flowers and more (noticeable performance impact).
Weather Override (Foggy_Deep and Hurricane) — replaces 'Foggy' with 'Foggy_Deep' and 'Thunder' with 'Hurricane'.
Weapons Overhaul Pack — overhauls muzzle and firing effects.
NaturalVision Sounds Pack — replaces/adjusts weapon, vehicle and siren sounds.
Hide Weapon Reticle and Damage Overlay — removes weapon reticle and damage indicator overlay (not sniper or homing launcher).
Night Vision Swap — replaces night vision with green or white phosphor.
Darker Nights — makes nights extremely dark (supports specific weathers).
Vanilla Unicorn Interior Overhaul — high-res parallax textures, neon lights for the strip club interior.
Mission Row Police Department Overhaul — high-res parallax textures for MRPD interior/exterior.
Realistic License Plates — replace in-game plates with realistic California plates.
Sandstorm Weather Effects — sandstorm in Grand Senora desert (noticeable performance impact).
NVE 2020 Weather Filter — modifies Extrasunny, Clear and Cloudy to look like NVE 2020.
Reduce Snowflakes Intensity — reduces snowflake particle intensity.
Snowflakes Lens Effect — creates snowflakes lens effect on screen when Snow weather enabled.
Spring Season Pack — modifies vegetation for Spring.
Autumn Season Pack — modifies vegetation for Fall.
Halloween Content Pack — places Halloween-themed content around the map.
Christmas Content Pack — places Christmas/Winter themed content (Alamo Sea rumored frozen).
Discord Server
Join this Discord server for support or to chat with other modders:
Developer Credits
Rockstar Games & Rockstar North — Thank you for creating Grand Theft Auto V!
Headshots_Ops
Additional Credits
Last updated